
Modern Tools, Traditional Craft: Making Leather Stamps with 3D Printing and OpenSCAD
Notes from the workshop: Modern Tools, Traditional Craft: Making Leather Stamps with 3D Printing and OpenSCAD.
Modern Tools, Traditional Craft: Making Leather Stamps with 3D Printing and OpenSCAD
I’ve been experimenting with leatherworking for a few years now, and one of the things I’ve really enjoyed is finding ways to combine traditional craft techniques with modern tools like 3D printing, laser cutting, and CAD software.
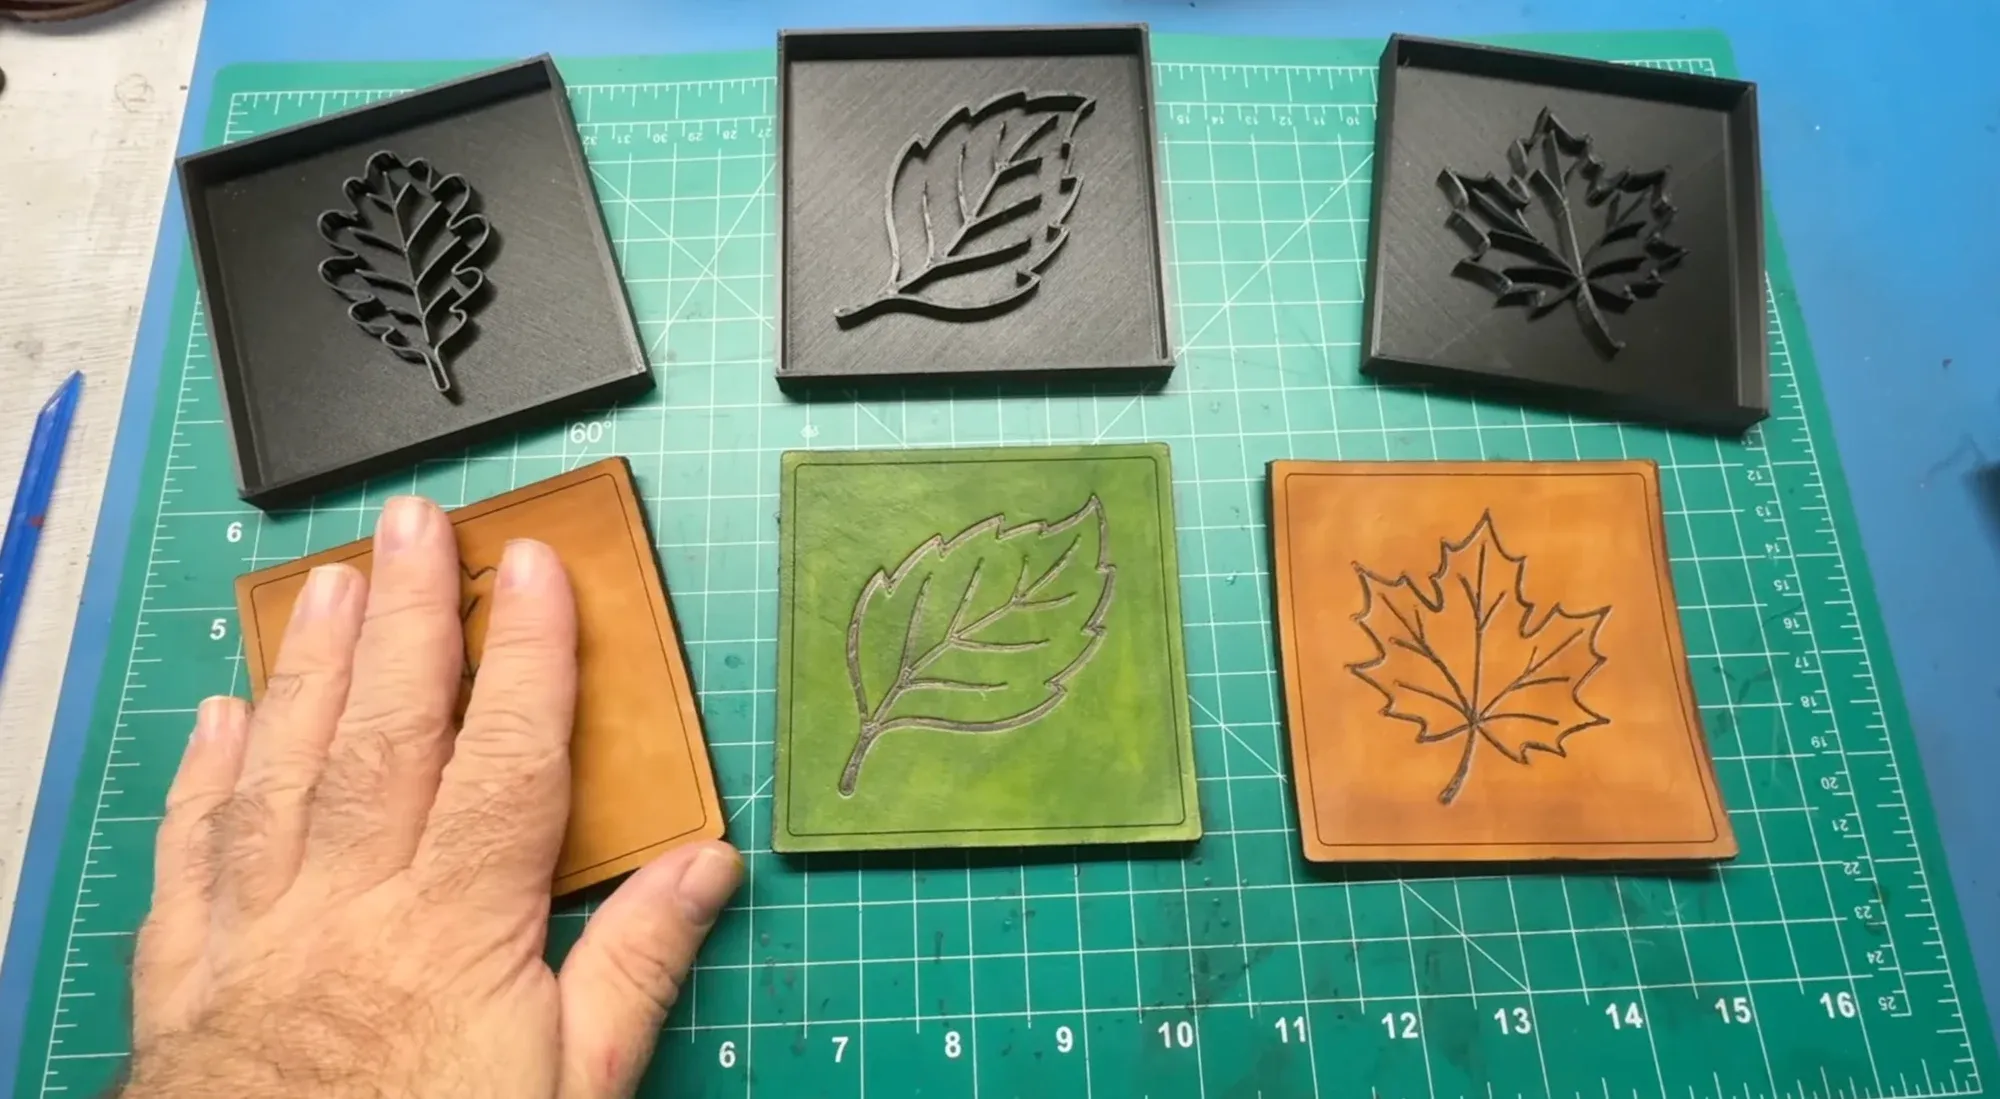
For this project, I decided to make a set of leather coasters featuring embossed leaf designs. Rather than purchasing leather stamps, I designed and 3D printed my own using OpenSCAD.
The results turned out pretty well, and I wanted to share the process along with the OpenSCAD files so you can experiment with your own designs!
Watch the Video
I put together a video walking through the entire process, including preparing the leather, using my arbor press, generating the stamps in OpenSCAD, and finishing the coasters.
This post goes a little more in depth than the video, and includes information on how to adjust the Open SCAD file for different size leather, as I know not everyone will be using 4mm thick leather (which is quite thick).
Starting with the Leather
For these coasters, I’m using vegetable-tanned cowhide belly leather that’s almost 4 mm thick. It’s a little heavier than what you might typically use, but I’ve found it works pretty well for coasters.
One of the nice things about vegetable-tanned leather is that it can be cased — essentially dampened with water — which allows it to take an impression when pressure is applied.
I originally cut my coaster blanks using my laser cutter. However, thicker leather can be a challenge, and a few areas didn’t cut completely through. Fortunately, cleaning up the edges is pretty straightforward.
I’ve also found that a good pair of heavy-duty titanium scissors works surprisingly well for cutting thicker leather. Sometimes the simplest tool is the best option!
For this project, I’m working with square coaster blanks approximately 100 mm across.
Designing the Embossing Stamps
This is where things get interesting.
I created three different leaf designs and converted them into 3D printable stamps. The idea is relatively simple: take a piece of two-dimensional vector artwork, extrude the lines to create raised features, and print the resulting model.
One of the most important considerations is the thickness of your artwork.
Because these stamps are going to be subjected to quite a bit of pressure, you don’t want extremely thin features that could break. I generally try to keep my lines around 1–1.5 mm wide, although finer details may work depending on the design, filament, and printing conditions.
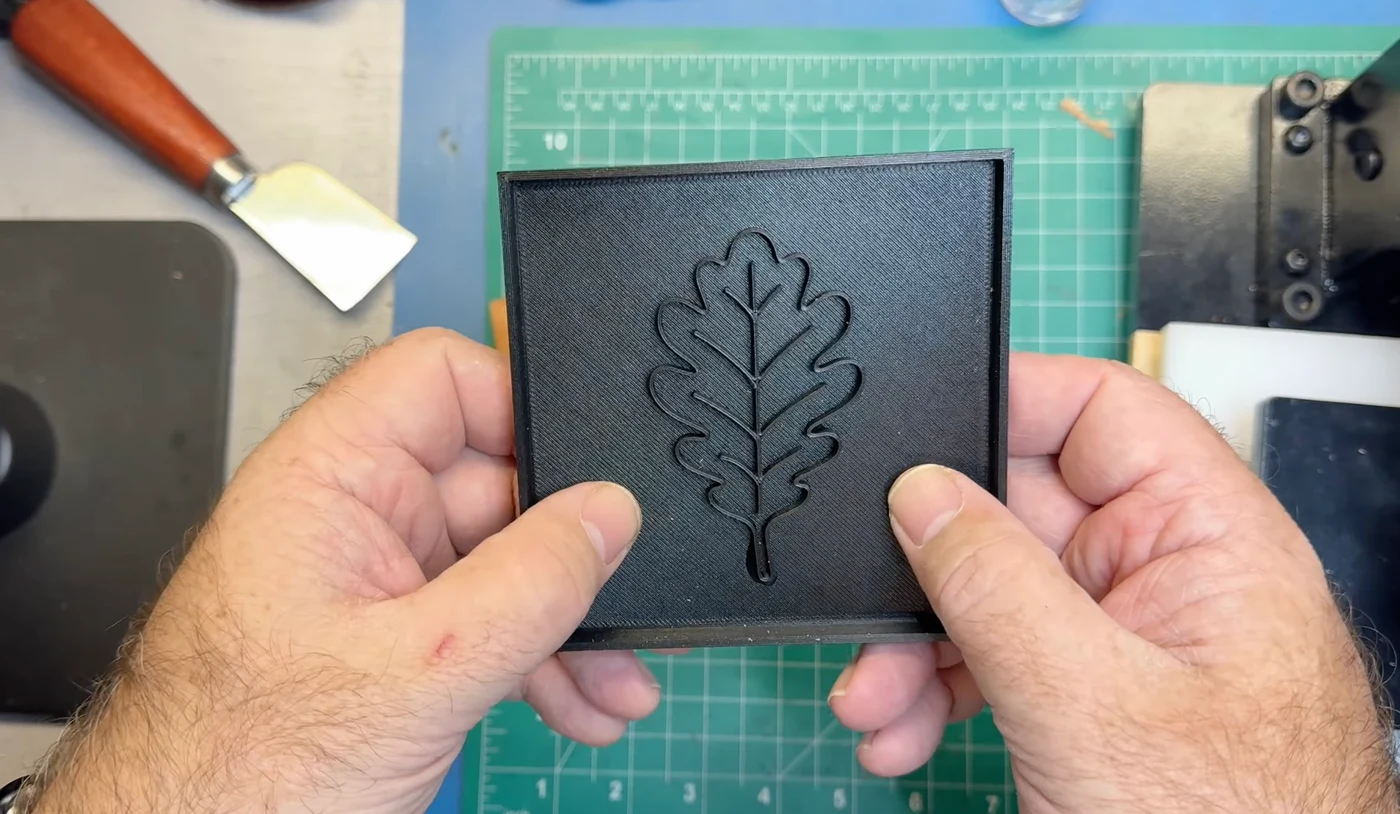
I’ve been using carbon-fiber PLA (CF-PLA) for my stamps. It’s quite stiff, prints nicely, and I’ve had good results with it. Other materials like PLA Pro, ABS, or ASA may also work, although I haven’t tested all of them for this particular application.
Another nice thing about 3D printing is that if a design doesn’t work quite right, you can always make a few adjustments and print another one.
Using OpenSCAD to Generate the Stamps
I’ve been using OpenSCAD for many years. Coming from a software development background, I’ve always appreciated the ability to define 3D objects using code rather than relying entirely on a graphical CAD interface.
OpenSCAD is also particularly interesting now that AI tools can help generate and modify code.
For this project, I developed a reusable OpenSCAD script that takes SVG artwork and turns it into a 3D printable leather stamp.
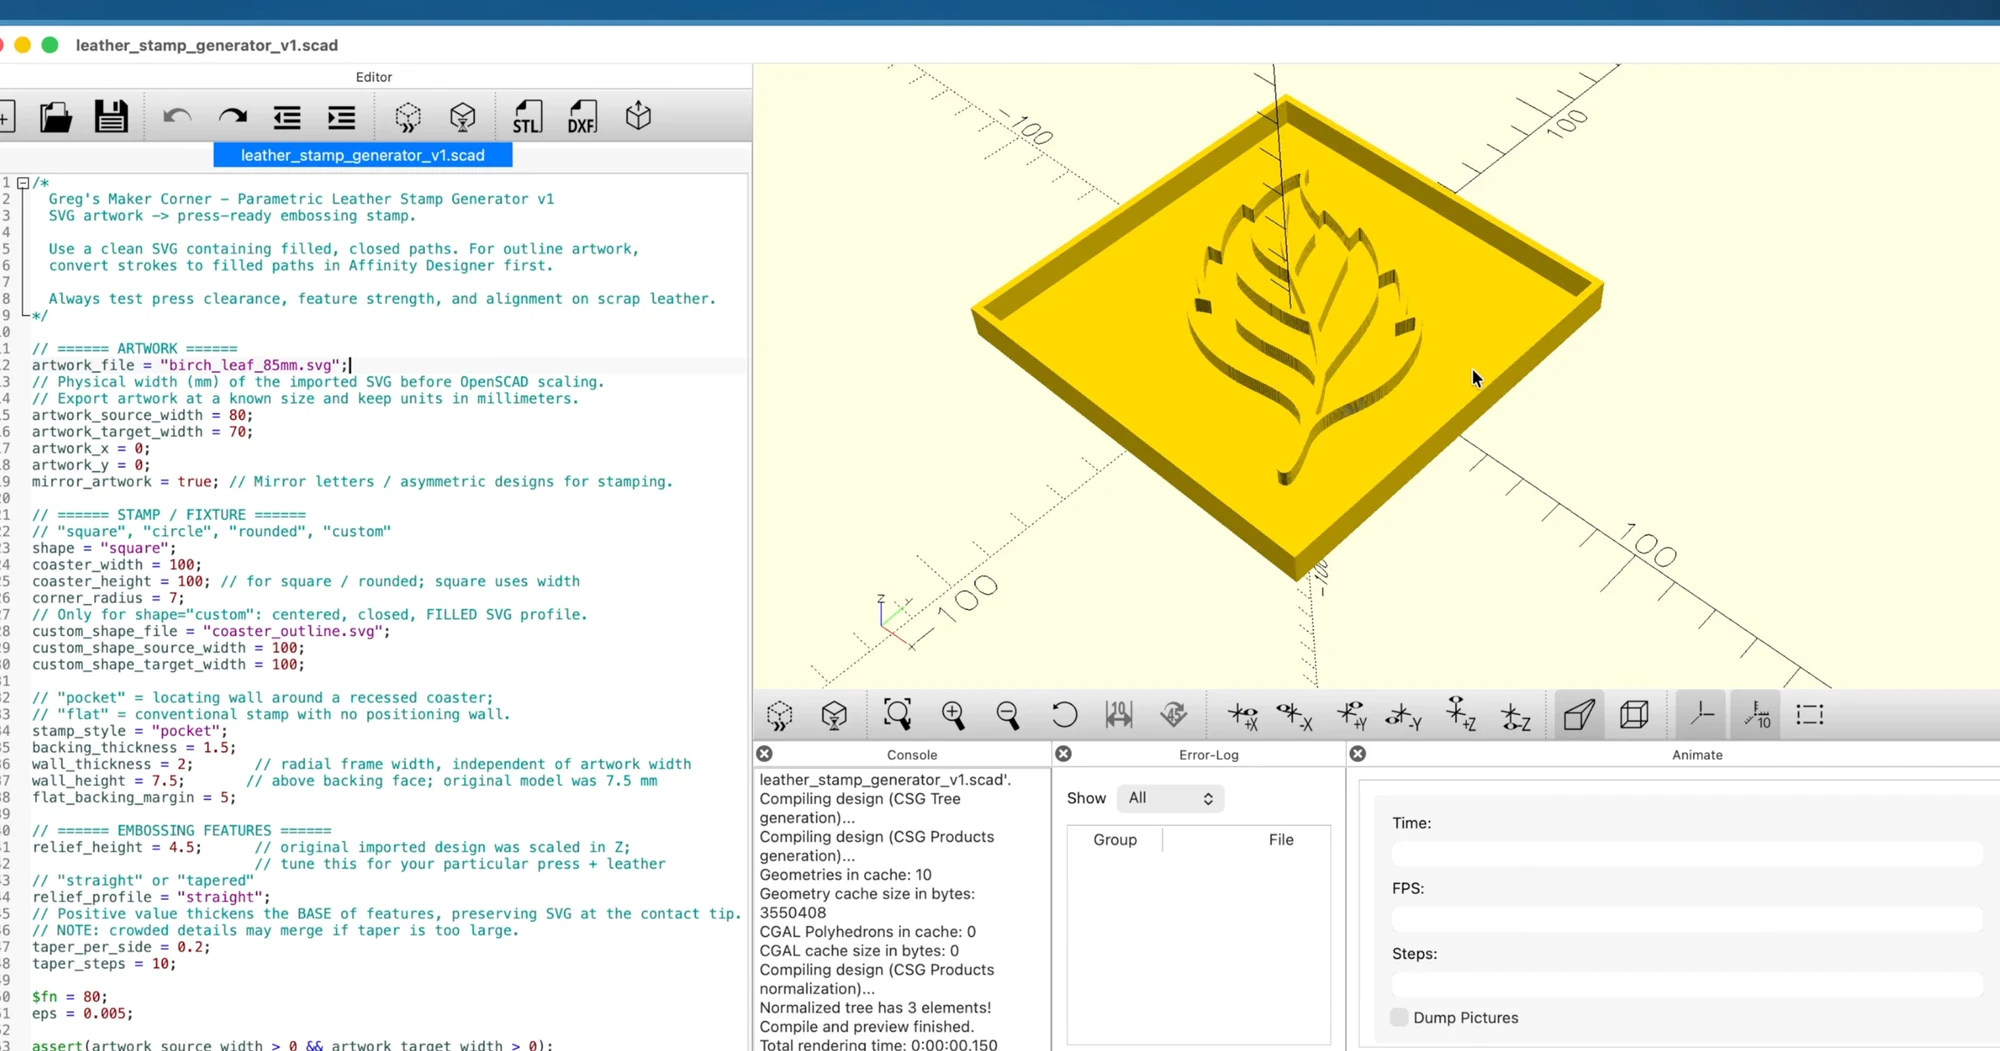
The script supports several coaster shapes:
- Square
- Circle
- Rounded rectangle or square
- Custom shapes using an SVG outline
It also includes options for controlling the embossing depth, stamp thickness, artwork positioning, and registration walls.
The registration wall is particularly useful. Rather than trying to manually center your artwork on a piece of leather, the stamp includes a surrounding frame that helps position the coaster before pressing. One thing I didn’t cover in the video is adjusting the registration wall for different leather thicknesses.
Ideally, you want most of the leather to sit within the registration area, with approximately 0.5–0.75 mm extending beyond the top of the registration wall. This allows the press to apply pressure to the leather rather than the surrounding frame.
I’m using leather that’s approximately 4 mm thick, so the default settings in my GitHub repository work pretty well for my setup.
However, if you’re using thinner leather, you’ll probably want to adjust the registration wall height. The two parameters to be aware of are:
wall_height = 7.5;
relief_height = 4.5;
The wall_height controls the height of the registration wall, while relief_height controls how far the embossing artwork extends from the backing plate.
For example, if you’re using 3 mm leather, I’d suggest starting with:
wall_height = 6.75;
relief_height = 4.5;
This should leave approximately 0.75 mm of leather extending beyond the registration wall.
You can experiment with these settings depending on the thickness of your leather and how deep you want the impression. I generally recommend making a test impression on scrap leather before committing to your finished piece.
Once you’ve configured the template, creating another stamp is pretty straightforward. You can simply replace the SVG artwork, adjust the dimensions if needed, and generate a new model.
Get the OpenSCAD Files on GitHub
I’ve made the OpenSCAD generator available on GitHub for anyone who wants to experiment with it.
Download the Leather Stamp Generator on GitHub
The repository includes:
leather_stamp_generator_v1.scad— the OpenSCAD script used to generate the stamp.compass_example.svg— an example SVG you can use to get started.AI-Instructions.md— an example prompt for using AI to convert existing artwork into SVG files suitable for embossing.
You don’t need to have extensive CAD experience to use the script. Most of the configuration is handled through variables near the top of the OpenSCAD file.
Of course, if you’re comfortable with OpenSCAD, you’re welcome to modify the script and improve upon what I’ve done.
Creating Your Own SVG Artwork
The most important thing you’ll need to provide is the artwork itself.
For one of my leaf designs, I purchased vector artwork from an artist on Etsy. I like supporting other creators, and there are quite a few excellent designs available.
You can also draw your own artwork using a vector editor like Affinity, or have an AI assistant help generate or convert artwork into SVG format.
I’ve included the AI instructions I use in the GitHub repository. The goal is to preserve the original artwork while producing clean, closed vector paths that can be imported into OpenSCAD.
For my coaster designs, I generally work with artwork around 80–85 mm wide, leaving some space around the edges of the coaster.
The OpenSCAD script can scale artwork to the desired dimensions, so you have some flexibility.
3D Printing the Stamps
Once I’ve imported my SVG and configured the OpenSCAD script, I render the model and export it as an STL file.
From there, I bring it into PrusaSlicer, where I use a profile configured for CF-PLA.
I printed these stamps on my Voron 3D printer, deliberately keeping the print speed relatively slow. Each stamp took approximately 1.5–2 hours.
I didn’t do any special post-processing or ironing on the contact surfaces. The prints came out pretty flat, and the resulting texture didn’t bother me for these particular coasters.
Depending on your printer and desired finish, you may want to experiment with different print settings.
Embossing the Leather with an Arbor Press
Once the stamps are printed, it’s time to put them to work!
I’m using an adjustable arbor press from Good Crafter that I originally purchased for leatherworking. It’s also useful for cutting leather with steel dies, including dies that punch stitching holes.
Because my 3D printed stamps are a different height than those cutting dies, I use a few pieces of hardwood to build up the working surface and get everything positioned correctly.
Before embossing, I dampen the vegetable-tanned leather with water. This is called casing the leather, and it helps the fibers take an impression.
I then position the leather in the stamp’s registration area and place it under the press.
My press is a little smaller than the coaster, so I apply pressure in a few different areas rather than trying to emboss the entire design in one motion.
After removing the coaster, I can clearly see the leaf impression in the leather. The depth turned out about where I wanted it, and even some of the finer details came through nicely.
It’s a pretty satisfying process, especially knowing that the stamp itself was something I designed and printed!
Finishing the Coasters
To finish these coasters, I used Fiebing’s Pro Dye in black to highlight the embossed leaf designs.
I carefully applied the dye to the recessed areas of the artwork, which helps bring out the details and provides some contrast against the leather.
For the remaining leather surface, I applied dye using a dauber.
I’m pretty happy with how these turned out. The combination of the natural leather texture, the embossed designs, and the contrasting colors gives each coaster a handcrafted appearance.
And because the stamps are reusable, I can make more coasters or experiment with different finishing techniques without having to create the embossing tools again.
Combining Modern Tools with Traditional Craft
One of the things I enjoy most about projects like this is that they bring together several different interests.
Leatherworking has been around for centuries, but tools like 3D printers, laser cutters, OpenSCAD, and even AI make it possible to approach traditional crafts in some interesting new ways.
I’m certainly not suggesting this is the only way to make leather stamps, or even necessarily the best way. It’s simply a process I’ve developed through experimenting, making adjustments, and figuring out what works for me.
And that’s really what Greg’s Maker Corner is all about.
Once you’ve got the OpenSCAD template working, there’s a lot you can do with it. You could create stamps for other leather projects, experiment with different artwork, or build an entire library of reusable embossing designs.
If you decide to give this a try, I’d love to hear how it works for you, especially if you come up with improvements to the design or process.
Project resources:
- OpenSCAD Leather Stamp Generator — GitHub
- Watch the Full YouTube Tutorial
Modern Tools, Traditional Craft: Make Your Own 3D Printed Leather StampsWatch on YouTube ↗ - Download OpenSCAD
- AI Artwork Conversion Instructions
And if you’re interested in some of the other leather goods I’ve been making, feel free to check out my Greg’s Maker Corner Etsy Shop. I don’t currently have these coasters listed, but I do have journals, wallets, and other handmade leather projects available.
Thanks for stopping by, and happy making!
Greg’s Maker Corner — Building, Tinkering & Exploring.